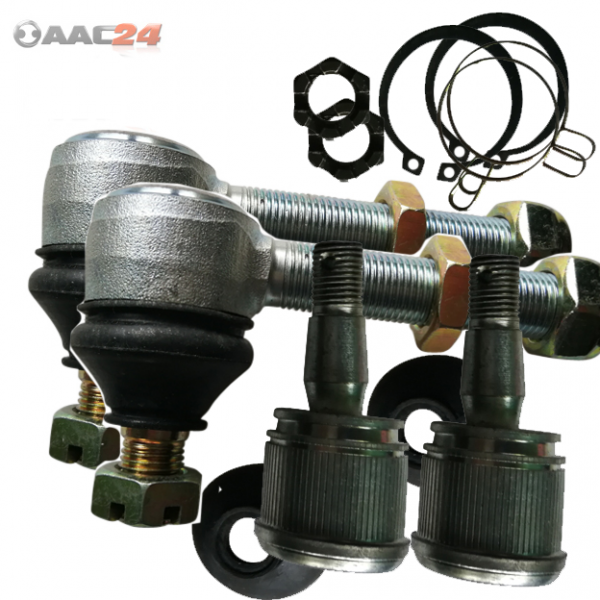
Product information "Set 4 x wishbone head top and bottom Haili SP 307-J 250cc Jinling ATV"
The Complete Package for a Stable Chassis! – Set of 4 Ball Joints incl. Febi MoS2 Grease
Total A-Arm Overhaul – Maximum safety for 250cc to 350cc Quads
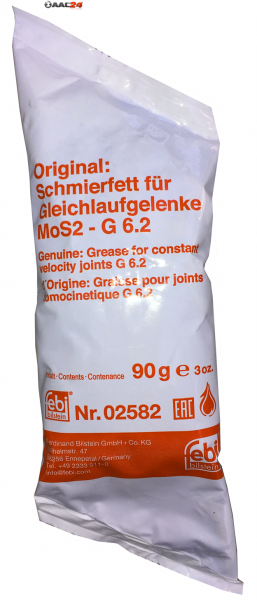
Restore your quad's steering precision to the max! This complete set includes all four ball joints for the front axle (2x upper, 2x lower). These joints are the critical connection points between the A-arms and the steering knuckles. Made of heavy-duty steel and equipped with protective dust boots, this set is perfectly tailored for sporty quads like Haili, Jingling, and Spy Racing. As a special bonus, this set includes 90 grams of original Febi MoS2 constant velocity joint grease to guarantee extremely long-lasting lubrication and minimal friction.
Technical Specifications & Details
Set Contents:
2 x Upper Ball Joints: Thread combination M14 / M16
2 x Lower Ball Joints: M14 Bolt (36 mm Press-in model)
Bonus: 1 x Tube Febi MoS2-G 6.2 Grease (90g)
Compatibility:
Haili: SP 307-J (250cc)
Jingling: JLA-21B
Spy Racing: 250F1 and 350F3 models
Also fits many identical Chinese quads and ATVs.
Benefit: Everything in one set – saves time and ensures a perfectly tuned chassis.
Visual Compatibility: Before installation, perform a visual check. Compare the thread dimensions (M14/M16 upper) and the press-in diameter (36 mm lower) with your original parts.
Lubrication: Use the included Febi MoS2-G grease to generously lubricate the ball joints before fitting the boots or during assembly. MoS2 grease is particularly pressure-resistant and provides ideal protection against wear under high impact loads.
Pressing (lower): The lower joints must be pressed into the A-arm. Use a press or a suitable pull-in tool. Be sure to secure the joint with the snap ring after pressing it in.
Chassis Alignment: Since replacing the upper joints (M16 thread) affects the camber, a front axle measurement and adjustment (toe and camber) is mandatory after installation.
Safety: Replace all cotter pins with new ones during assembly and tighten the nuts to the specified torque. Re-check the tightness of all connections after the first test ride
Related links to "Set 4 x wishbone head top and bottom Haili SP 307-J 250cc Jinling ATV"


 for Xinyang XY500ATV")


 – Fits ATV/Quad M10 & many China Quad Models")


 – M14/M16 – For Haili, Jingling, SPY Racing")
 ATV 250 JLA-21B 300 JLA 931E")
